Jamf Connect Package Preparation
To prepare Jamf Connect for deployment, you must complete the following package management and building steps:
-
Download the Jamf Connect package from Jamf Nation.
-
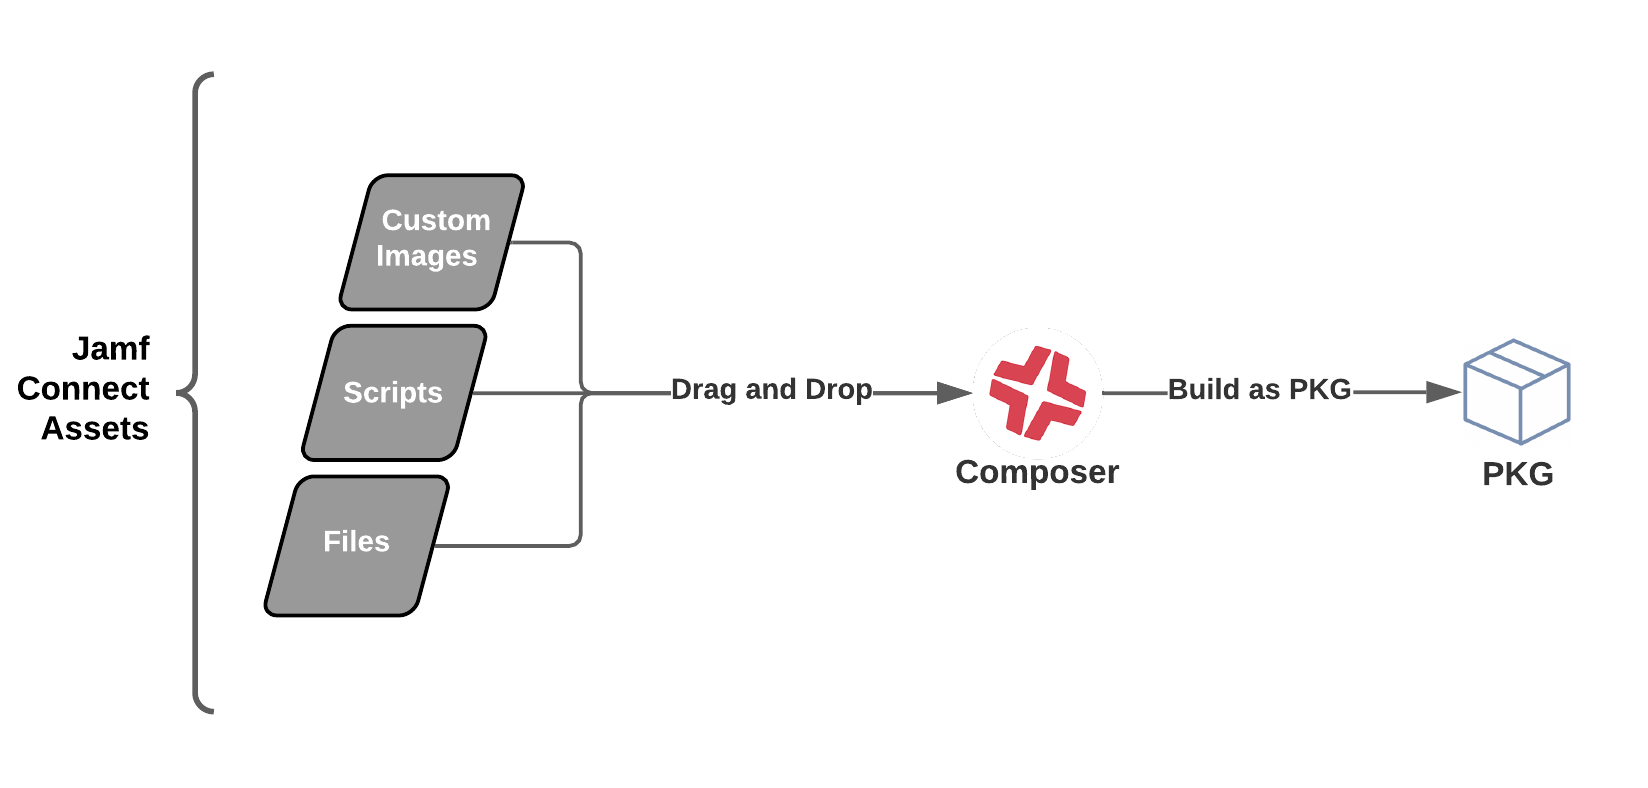
Use Composer to package all the custom files and images used by Jamf Connect.
-
Upload the Jamf Connect and custom assets packages to Jamf Pro.
Downloading the Jamf Connect Package
-
Log in to Jamf Nation.
-
Click the user icon in the top-right, and then click My Assets.
-
Cick Jamf Connect
-
Click Download for Mac.
The DMG downloads and opens on your computer. -
Drag the Jamf Connect PKG from the DMG to a preferred location in the Finder.
-
(Optional) Click the Resources folder and drag the launch agent package to the same location as the Jamf Connect PKG.
The Jamf Connect PKG is now ready to be uploaded to Jamf Pro.
Packaging Files and Images with Composer
You can use Composer to package custom files and images used by Jamf Connect. Create a package source by creating a folder on your computer where you want your custom files to be installed during Jamf Connect deployment (e.g., /usr/local) and then use drag and drop to create the new package source and to build it in Composer.

Depending on your user experience goals with Jamf Connect, common files in this package include the following:
-
Custom images
-
Notify screen script
-
Login window help file
-
Acceptable use policy file
-
Menu bar app scripts
Requirements
-
Composer
-
Files and images to use with Jamf Connect
-
A valid certificate to sign the package, if deploying via Automated Device Enrollment. If deploying Jamf Connect with a Jamf Pro enrollment package, see the Creating a Signing Certificate using Jamf Pro's Built-in Certificate Authority Knowledge Base article.
Procedure
-
Open the Finder.
-
Press Command-Shift-G to prompt a Finder search window.
-
Enter the file path that you want to use to store your Jamf Connect files and images during deployment, and then click Go.
Note: Storing images and icons at /usr/local on computers is recommended.
-
Create a new folder in your chosen location. If creating the folder at /usr/local or another privileged space, you may be prompted to authenticate as an administrator to create the folder.
-
Name the folder (e.g. "jamfconnect").
-
Add your custom files and images to the folder.
-
Open and authenticate to Composer, and then drag your created file from the Finder to Composer's sidebar. A new package source should display.
-
Navigate to your Jamf Connect folder in Composer and configure the following ownership settings:
-
Choose "root (0)" from the Owner pop-up menu.
-
Choose "wheel (0)" from the Group pop-up menu.
-
Click the Action button
 to the right of the X-column, and select "Apply Owner and Group to jamfconnect and All Enclosed Items" in the pop-up menu.
-
-
For each file type in your folder, apply the following permissions:
File Type
Permissons
Parent folder

Images

Notify script

Menu bar app scripts

-
In the toolbar, click Build as PKG
 .
. -
Select a location to save the package and click Save.
Your PKG with Jamf Connect files and images can now be deployed using via the Enrollment Packages payload in a PreStage Enrollment with Jamf Pro. Make sure you save the file path of each file in the package; you need these values to map to their associated settings in your Jamf Connect configuration profiles.
Note: Packages must be signed using a certificate that is trusted by the computer at the time of enrollment. Signing the package with a certificate generated from either the Jamf Pro built-in CA or from an Apple Developer Program account is recommended. For more information about signing certificates, see the following Knowledge Base articles:
Uploading the Packages to Jamf Pro
Upload the Jamf Connect PKG and custom files package to Jamf Pro.
Requirement
To upload a package to Jamf Pro, your principal distribution point must be a cloud distribution point.
For more information, see the Cloud Distribution Point section in the Jamf Pro Administrator's Guide.
Procedure
-
In Jamf Pro, click Settings
 .
. -
Click Computer Management.
-
In the “Computer Management” section, click Packages
 .
. -
Click New
 .
. -
Use the General pane to configure basic settings for the package, including the display name and category.
Note: When uploading the Jamf Connect PKG, include the version number in the display name to help you identify keep track of which version of Jamf Connect you are deploying.
-
Click Upload Package and upload the package.
-
Click the Options tab and configure additional settings for the package, including the priority.
Important: If you are uploading a custom files package for Jamf Connect, assign this package a priority value that is lower than the Jamf Connect PKG, such as "1". This will help ensure that your custom files are installed and available for Jamf Connect to use.
-
Click Save.
The package is now displayed as an uploaded package in Jamf Pro.
Related Information
For related information about packages with Jamf Pro, see the Package Management section of the Jamf Pro Administrator's Guide.
For related information about custom branding settings available in Jamf Connect, see the Custom Branding section in the Jamf Connect Administrator's Guide.
For related information about creating packages with Composer, see the Composer User Guide.