Jamf Connect Configuration Profiles in Jamf Pro
You can use Jamf Pro to create a computer configuration profile that configures Jamf Connect settings with the Application & Custom Settings payload. This payload allows you to select Jamf Connect preferences, automatically generate a PLIST file, and configure the scope.
Depending on which components of Jamf Connect you plan to use, you must configure settings for the following Jamf application domains:
-
com.jamf.connect—Includes all settings for the Jamf Connect menu bar app
-
com.jamf.connect.login—Includes all settings for the Jamf Connect login window
Keep the following in mind when you configure Jamf Connect:
-
You can configure multiple Application & Custom Setting payloads in a single configuration profile. This allows you to configure multiple preference domains in a single configuration profile.
-
You can split your Jamf Connect settings into multiple configuration profiles written to the same preference domains. This allows you to easily add or remove a subset of Jamf Connect settings (e.g. enrollment-only settings).
Best Practice: Configuring Enrollment-only Settings in Jamf Connect
Best practices cover common scenarios; however, the following recommendations may not apply in your environment.
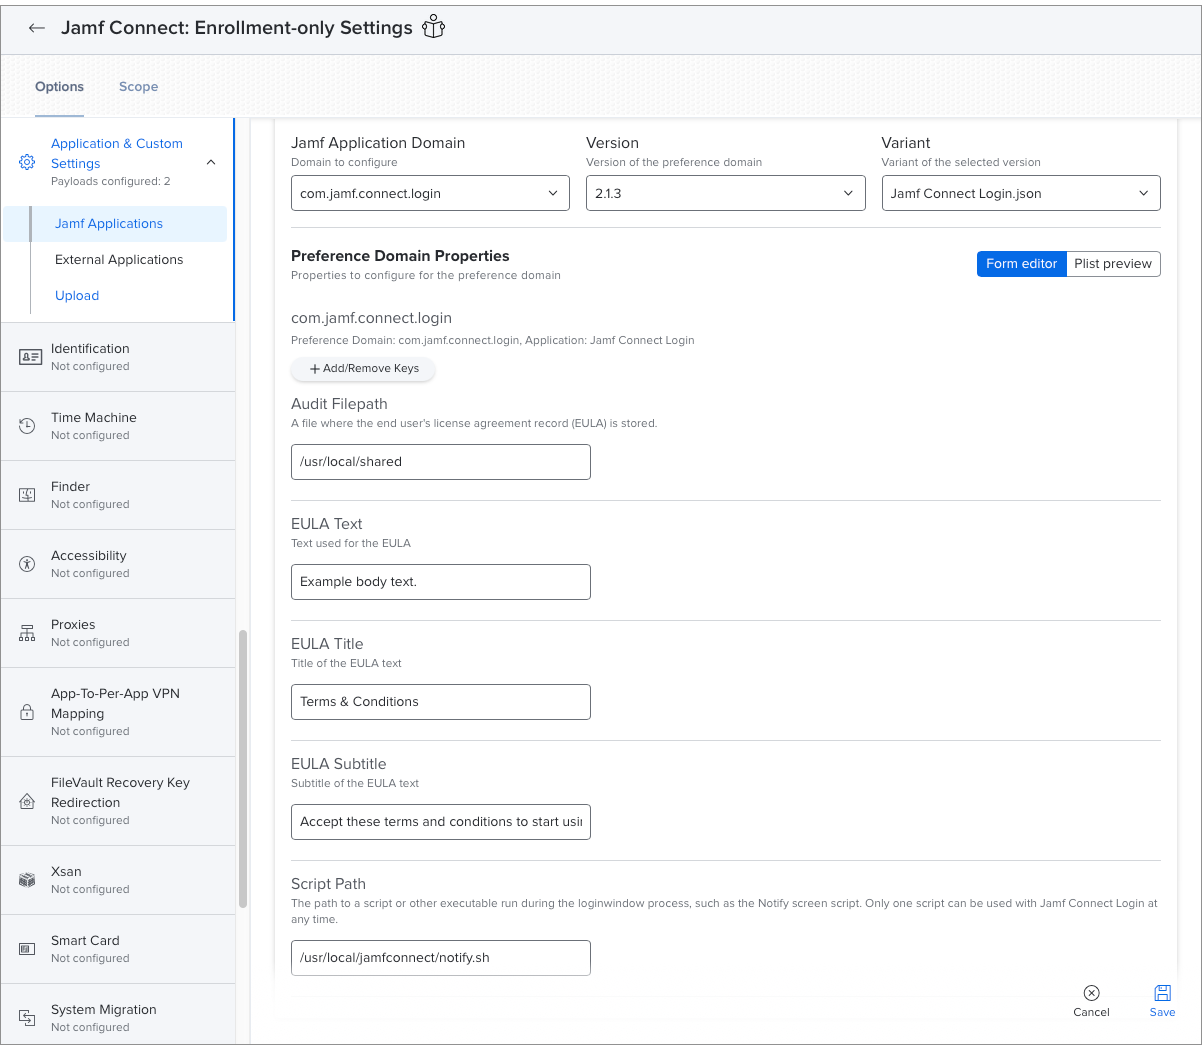
If you plan to configure Jamf Connect settings that should only be used during enrollment, you can create a separate configuration profile for these settings. Common settings include the following:
-
Acceptable use policy settings
-
Notify screen script
-
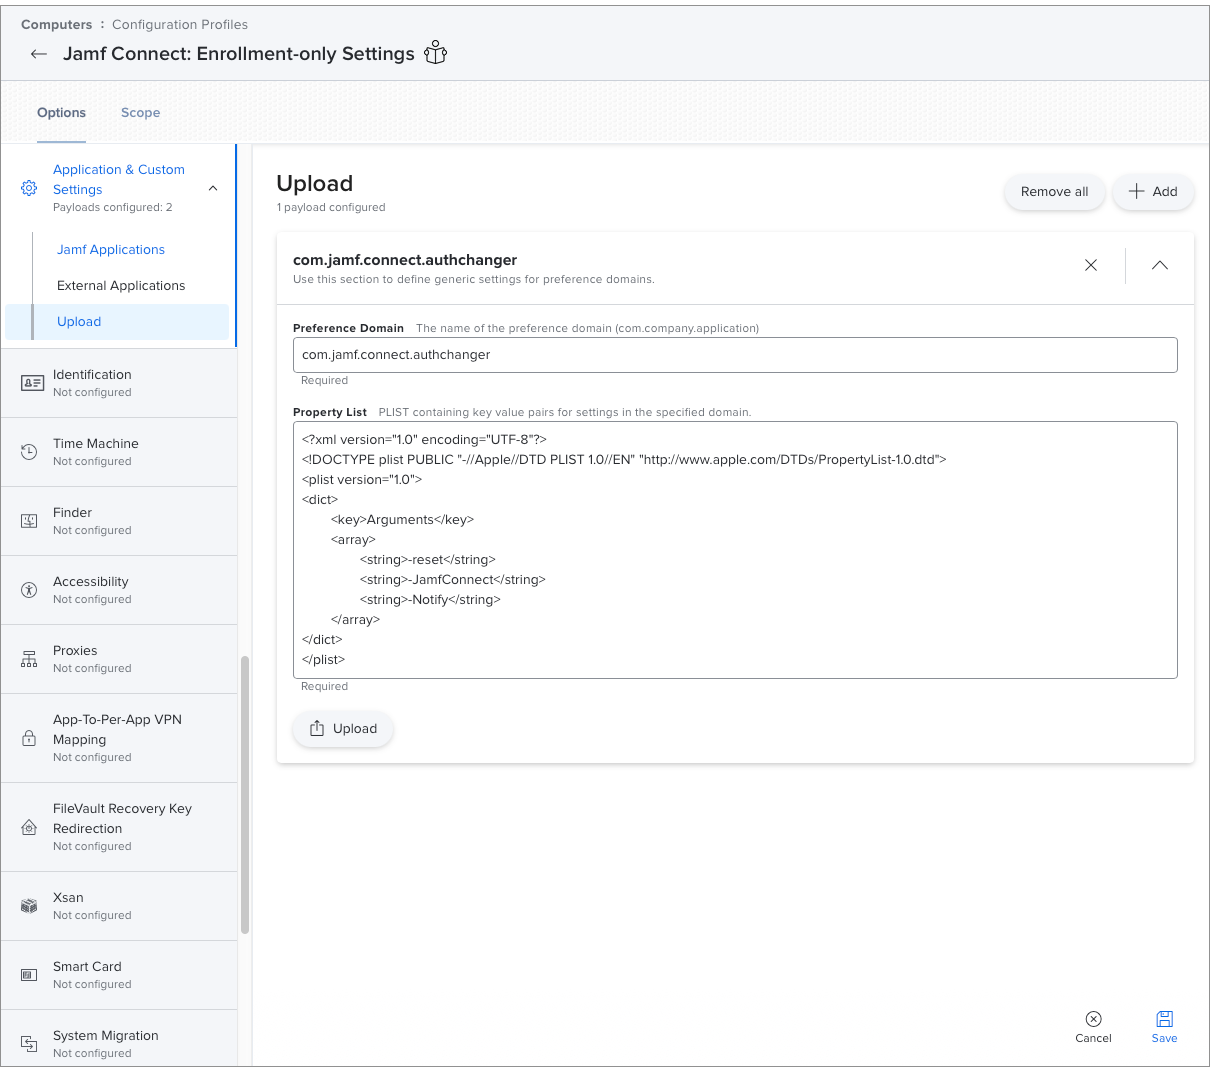
authchanger command-line arguments that enable the Notify screen
Create a configuration profile that includes the following Application & Custom Settings payloads:
-
Configure the com.jamf.connect.login preference domain with enrollment-only settings.
-
(Optional) If your organization uses the Notify screen, configure the com.jamf.connect.authchanger preference domain to enable the Notify screen after Jamf Connect is installed.
After enrollment is complete, you can remove computers from the configuration profile scope to ensure that the Acceptable Use Policy screen and Notify screen only display once.
Configuring Jamf Connect in Jamf Pro
You must configure Jamf Connect settings for each component of Jamf Connect (login window and menu bar app) that you plan to use in your organization.
Requirements
-
Integration with a cloud identity provider (IdP)
For more information, see Identity Provider Integrations in the Jamf Connect Administrator's Guide. -
Familiarity with your IdP's minimum authentication settings
For more information, see Authentication Settings in the Jamf Connect Administrator's Guide.
Procedure
-
In Jamf Pro, click Computers at the top of the page.
-
Click Configuration Profiles.
-
Click New.
-
Use the General payload to configure basic settings, including the level at which to apply the profile and the distribution method. Only payloads and settings that apply to the selected level are displayed for the profile. To distribute the profile during enrollment using a computer PreStage enrollment, ensure you create a computer-level configuration profile.
-
Use Application & Custom Settings payload to configure Jamf Applications.
-
Click Add.
-
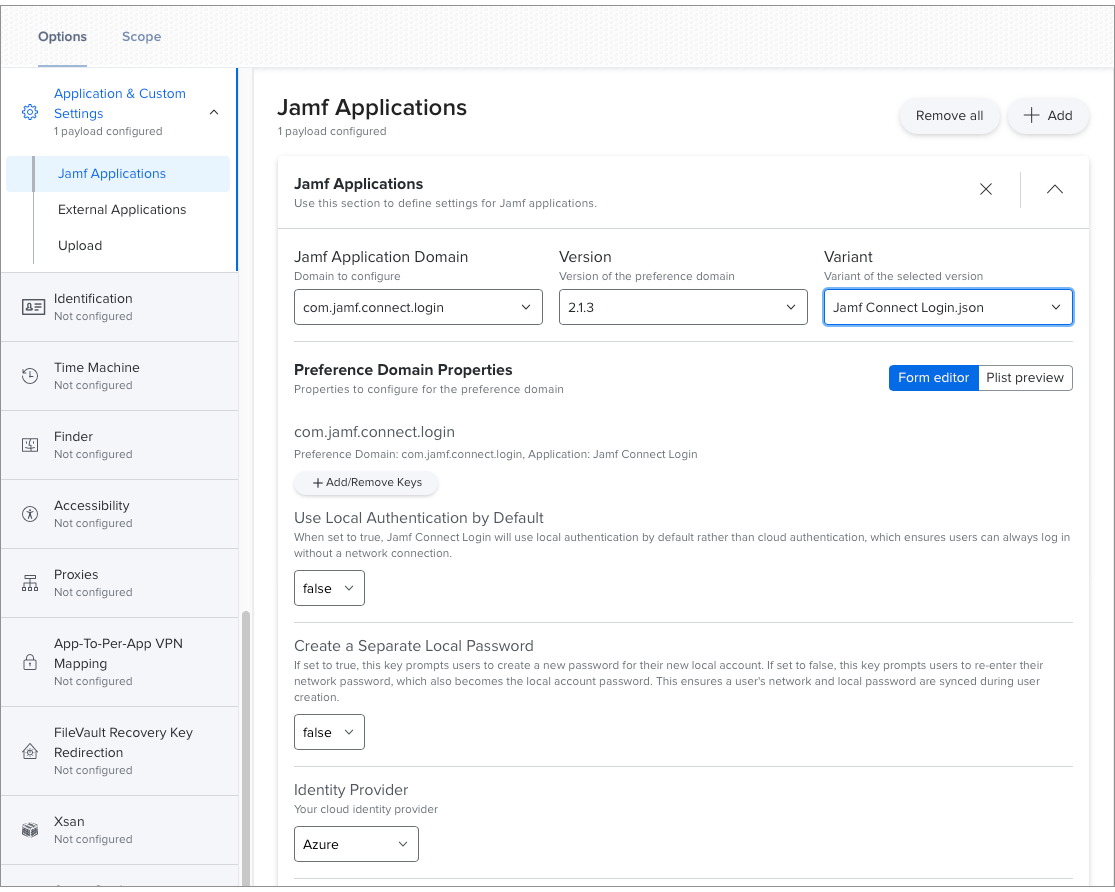
Select "com.jamf.connect.login" from the Jamf Application Domain pop-up menu.
-
Select a version of the preference domain you want to configure. The latest version is recommended.
-
Select "Jamf Connect Login.json" from the Variant pop-up menu. The Jamf Connect preference domain settings display.
-
Configure Jamf Connect settings.To determine which settings are required, see Authentication Settings in the Jamf Connect Administrator's Guide.
-
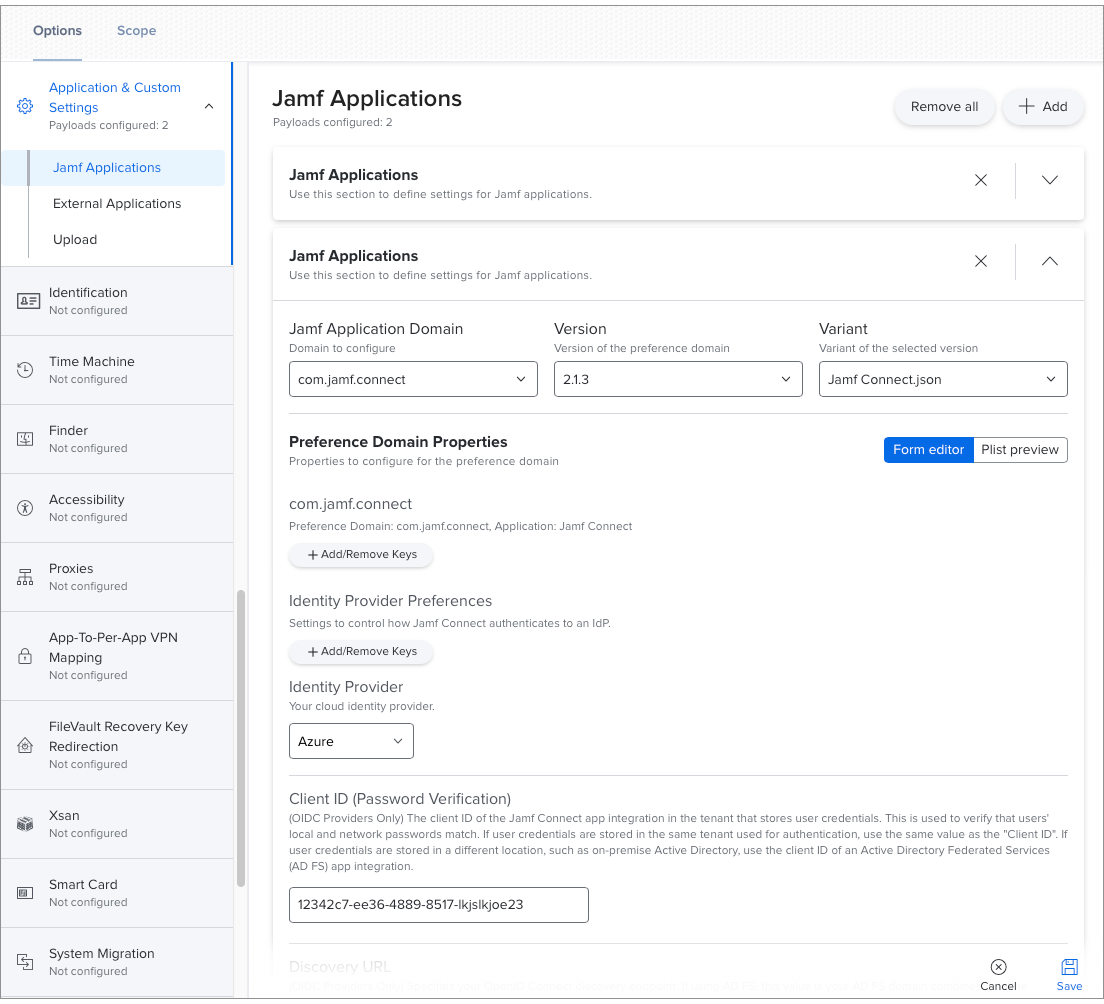
(Optional) If you plan to use the Jamf Connect menu bar app in your organization, click Add to configure settings for the Jamf Connect menu bar app preference domain (com.jamf.connect).
-
Click the Scope tab and configure the scope of the profile.
Note: Ensure the scope of the profile contains the computers that are in the scope of the PreStage enrollment. For more information about distributing configuration profiles during enrollment, see Computer PreStage Enrollments in the Jamf Pro Administrator's Guide.
-
Click Save.
Your configuration profiles are distributed to target computers when they check in with Jamf Pro.
Related Information
For related information, see the following sections in the Jamf Connect Administrator's Guide:
-
Authentication Settings
Learn about authentication settings specific to your cloud identity provider (IdP). -
Learn how to use the authchanger command-line tool and create configuration profiles that pass arguments to run.
-
Preference Key Reference
Learn about all configurable preferences in Jamf Connect.