Deploying an OS X Upgrade
Deploying OS X v10.7 or later as an upgrade involves the following steps:
-
Add the .app file for OS X to Casper Admin.
-
Cache the InstallESD.dmg file using a policy.
-
Create a smart computer group.
-
Create a Self Service policy for upgrading OS X.
Note: The name of the InstallESD.dmg file in Casper Admin will vary depending on the version of OS X that you plan to deploy. For example, the name of the InstallESD.dmg file for OS X v10.10 would be Install OS X Yosemite.InstallESD.dmg.
Requirements
-
The JAMF Software Server (JSS) v9.21 or later
Note: If you are using the JSS v8.3-9.1, see the following Knowledge Base article for instructions on deploying an OS X upgrade:
Deploying OS X v10.7 or Later -
Casper Admin
-
The .app file for the version of OS X that you plan to deploy (For example, Install OS X Mountain Lion.app.)
You can obtain the latest .app file for OS X from the Mac App Store. -
Managed computers with:
-
(For deployments of OS X v10.10 or later only) OS X v10.7 or later
Computers with OS X v10.5 or OS X v10.6 must be upgraded to OS X v10.7 or later before upgrading to OS X v10.10. -
Self Service
-
The system requirements for the version of OS X that you plan to deploy
-
OS X v10.7: http://support.apple.com/kb/HT4949
-
OS X v10.8: http://support.apple.com/kb/HT5444
-
OS X v10.9: http://support.apple.com/kb/HT5842
-
OS X v10.11: http://support.apple.com/kb/HT201475
-
-
Step 1: Add the .app File for OS X to Casper Admin
Add the .app file for OS X to Casper Admin. Casper Admin extracts the InstallESD.dmg file from the .app file so you can cache and install it using policies.
-
Open Casper Admin and authenticate to the JSS.
-
Drag the .app file to the main repository in Casper Admin.
Casper Admin extracts the InstallESD.dmg file, analyzes its contents, and adds it to the master distribution point and the JSS.
The InstallESD.dmg file is displayed in blue text until you add it to a category.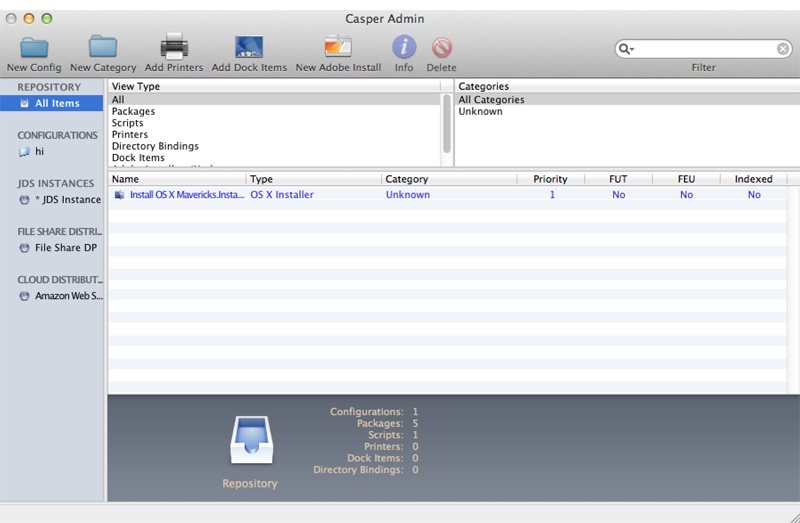
-
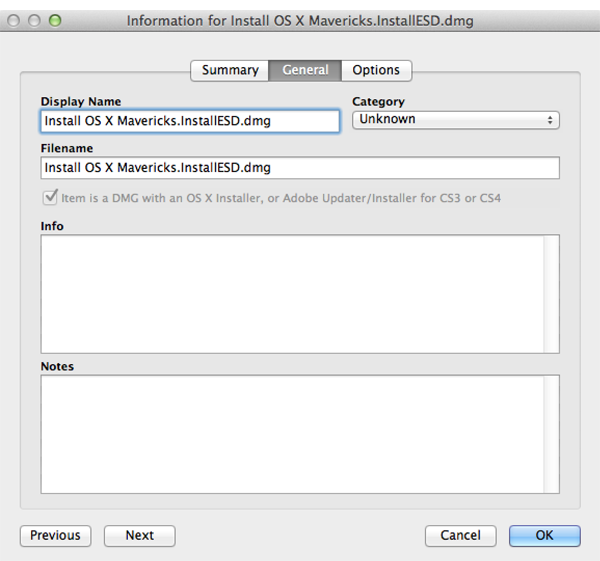
Double-click the package in the main repository.
-
Click the General tab and choose a category for the package.
-
Click OK.
Step 2: Cache the InstallESD.dmg File
After adding the .app file to Casper Admin, you can cache the InstallESD.dmg file using a policy. Caching the file ahead of time speeds up the upgrade process.
-
Log in to the JSS with a web browser.
-
Click Computers at the top of the page.
-
Click Policies.
On a smartphone, this option is in the pop-up menu. -
Click New
 .
. -
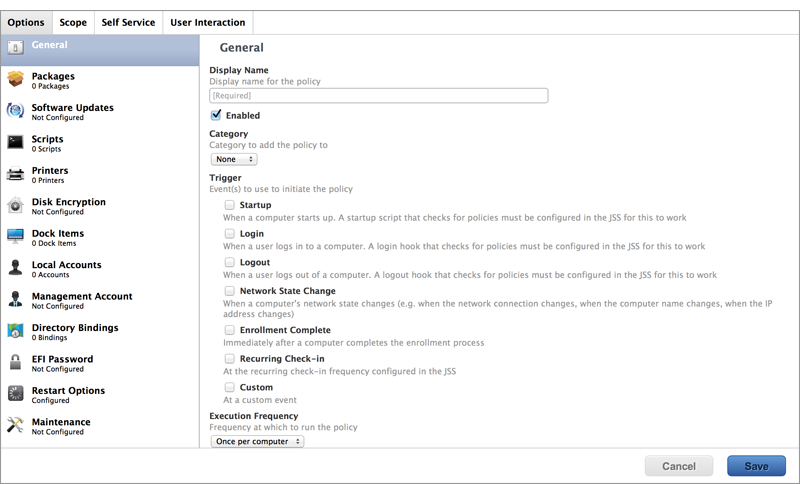
In the General payload, enter a display name for the policy. For example, “Cache InstallESD.dmg”.
-
Select Recurring Check-in as the trigger.
-
Choose “Once per Computer” from the Execution Frequency pop-up menu.
-
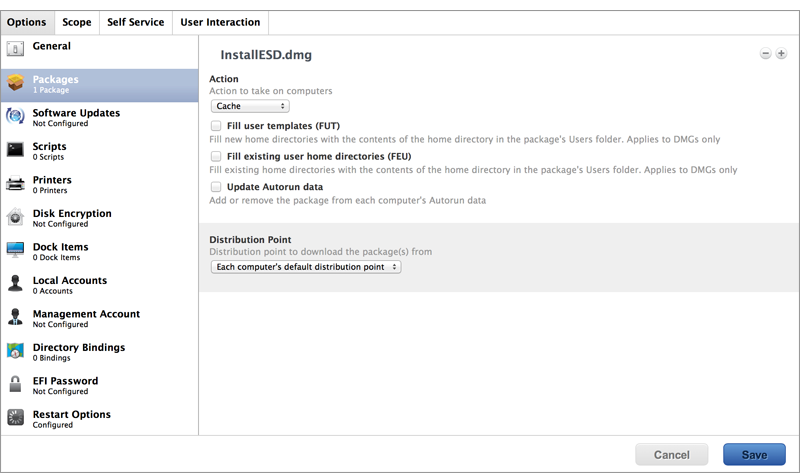
Select the Packages payload and click Configure.
-
Click Add for the InstallESD.dmg file.
-
Choose “Cache” from the Action pop-up menu.
-
Specify a distribution point for computers to download the package from.
-
Select the Maintenance payload and click Configure.
-
Ensure that the Update Inventory checkbox is selected.
-
Click the Scope tab and configure the scope of the policy.
-
Click Save.
The InstallESD.dmg file is cached on computers in the scope the next time they check in with the JSS and meet the criteria in the General payload.
Step 3: Create a Smart Computer Group
Create a smart group of computers with the InstallESD.dmg file cached. The smart group will be used as the scope of the Self Service policy for upgrading OS X.
-
Log in to the JSS with a web browser.
-
Click Computers at the top of the page.
-
Click Smart Computer Groups.
On a smartphone, this option is in the pop-up menu. -
Click New
. -
On the Computer Group pane, enter a display name for the smart computer group. For example, “InstallESD.dmg Cached”.
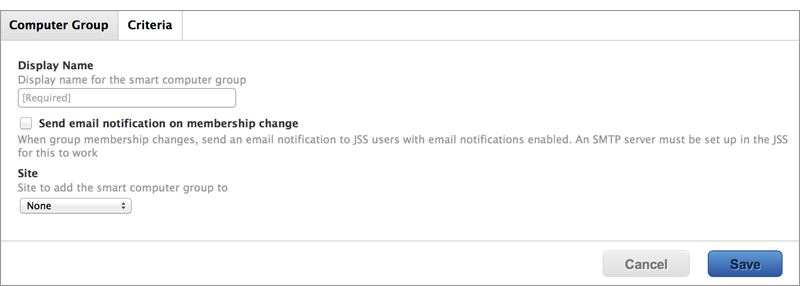
-
Click the Criteria tab.
-
Click Add
. -
Click Choose for “All Criteria”.
-
Click Choose for “Cached Packages”.
-
Choose “has” from the Operator pop-up menu.

-
Click Browse
 .
. -
Click Choose for the InstallESD.dmg file.
Note: The InstallESD.dmg file is not available as a value until it has been cached on at least one computer. -
Click Save.
Step 4: Create a Self Service Policy for Upgrading OS X
After caching the InstallESD.dmg file, you can create a Self Service policy that allows users to upgrade OS X.
-
Log in to the JSS with a web browser.
-
Click Computers at the top of the page.
-
Click Policies.
On a smartphone, this option is in the pop-up menu. -
Click New
. -
In the General payload, enter a display name for the policy. For example, “Upgrade OS X”.
-
Choose “Once per Computer” from the Execution Frequency pop-up menu.
-
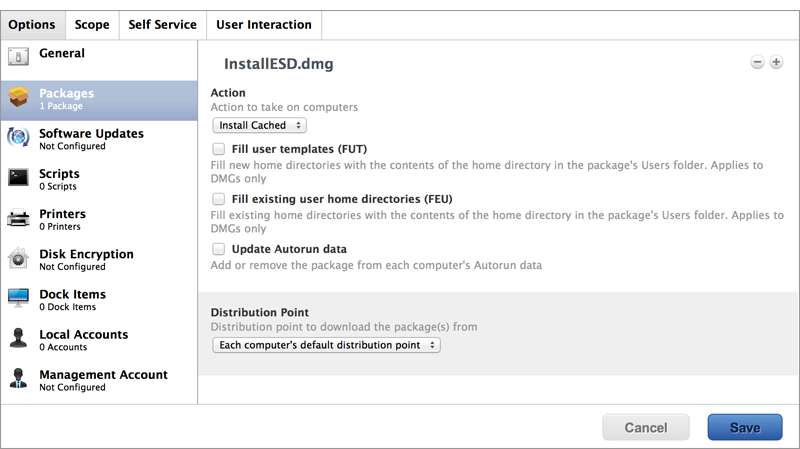
Select the Packages payload and click Configure.
-
Click Add for the InstallESD.dmg file.
-
Choose “Install Cached” from the Action pop-up menu.
-
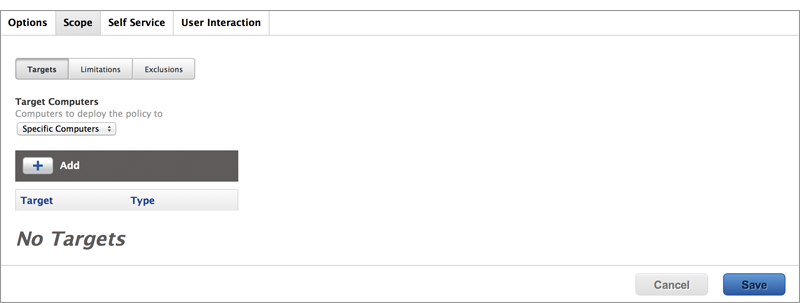
Click the Scope tab.
-
Click Add
. -
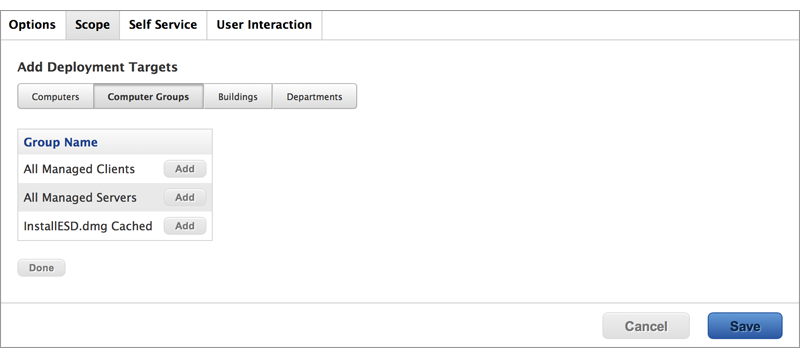
Click the Computer Groups tab.
-
Click Add for the smart computer group you just created.
-
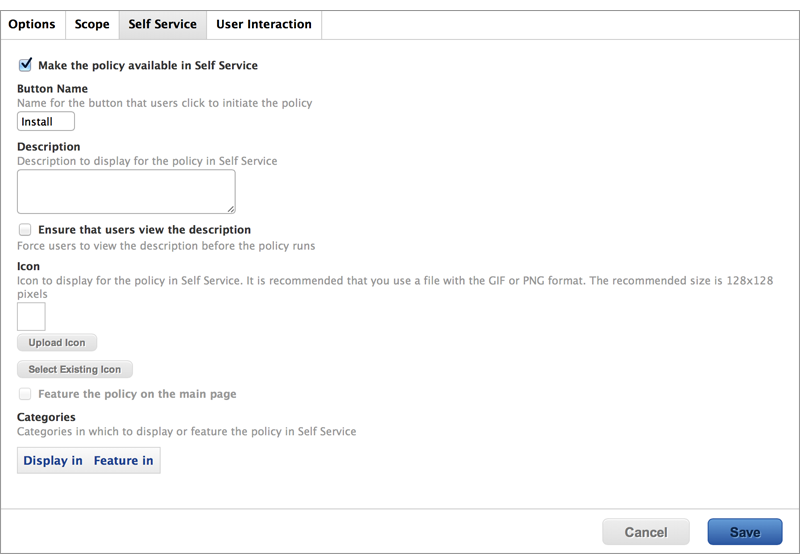
Click the Self Service tab.
-
Select Make the policy available in Self Service.
-
Configure how the policy is displayed in Self Service using the settings on the pane.
-
Click Save.
The policy is made available in Self Service on computers in the scope the next time they check in with the JSS and meet the criteria in the General payload. OS X is upgraded when users run the policy from Self Service.
Upgrading FileVault 2-enabled drives from OS X v10.7 or v10.8 prompts users to enter their password after reboot. Upgrading FileVault 2-enabled drives from OS X v10.9 or later automatically bypasses authentication after reboot.
Note: The jamf binary automatically enables Core Storage on the target computer before installing an OS X v10.11 upgrade using a policy. This only occurs for OS X v10.11 upgrades that are installed using a policy.