Deploying the Code42 CrashPlan App
Deploying the Code42 CrashPlan app involves the following steps:
-
Customize the Code42 CrashPlan App Installer.
-
Build a package of the Code42 CrashPlan app custom installation settings.
-
Upload the Code42 CrashPlan App Installer and the custom settings package to the JAMF Software Server (JSS).
-
Deploy the Code42 CrashPlan App Installer and the custom settings package using a policy.
Customizing the Code42 CrashPlan App Installer
This section explains how to customize the Code42 CrashPlan App Installer so that the installation process is completely automated and undisruptive to users. Code42 provides a script to make this customization easy.
Download and Modify the Code42 CrashPlan Installer
-
Download the Code42 CrashPlan App Installer customization resources from your Code42 CrashPlan server by navigating to: https://YourServerAddress:4285/download/Code42CrashPlan_Custom.zip
-
On an administrator computer, extract the Code42CrashPlan_Custom.zip file.
-
Open the userInfo.sh file in the Code42CrashPlan_Custom directory with a text editor.
-
To hide the installation from users, locate the startDesktop element and modify the value so that it looks like this:
startDesktop=false
-
To pass the username to the Code42 CrashPlan server during installation, locate the user element and modify the value.
Use the following command to select the user logged in last, before the deployment:user=`last | grep console | grep still | awk '{print $1}' | head -1`
You can find more information on this in the userInfo.sh file or online in the Preparing The Code42 CrashPlan App For Deployment Code42 support article.
-
Save and close the userInfo.sh file.
Create the Code42 CrashPlan Custom Installer Package
-
Open Terminal.
-
Navigate to the directory containing custom.sh.
For CrashPlan apps version 5.x and later:cd /Users/admin/Downloads/Code42CrashPlan_Custom
-
Make the custom.sh file executable with the following command:
chmod +x custom.sh
-
Run the following command:
./custom.sh
-
Review the default settings in the script. At the end, a prompt is displayed: Change settings (yes, no, or revert) [no]?
-
Type "yes".
-
When prompted for the “primary address and port to the authority that manages the accounts and issues licenses”, type the URL of your master server and press the Enter key. For example: "crashplan-master.example.com:4282".
-
When prompted for the “secondary address and port to the authority that manages the accounts and issues licenses”, type the second URL configured for your master server and press the Enter key. For example: "192.0.2.50:4282".
-
When asked whether to hide the address from the user, type “yes“.
-
When asked whether to “Lock server address setting so that user cannot change server address”, type “yes“.
-
When prompted, type your registration key.
Use the registration key specific to the default organization for new user registration. For example: "AAAA-BBBB-CCCC-DDDD".
For more information on Code42 organizations, see the Organizations Reference Code42 support article. -
When prompted for the username, press the Enter key.
-
When prompted for the password, type “${deferred}”.
Note: In non-LDAP environments, a password can be automatically generated by the CrashPlan app by using ${generated}. This will only work for the initial deployment, not for installation with an already known user. -
When a proxy is used, type “yes”. Otherwise, press the Enter key.
-
(Optional) When a proxy is used, type the URL of your .pac file.
-
To enable Single Sign-On (SSO), press the Enter key. Otherwise, type “no”.
-
If SSO is not required, press the Enter key. Otherwise, type “yes”.
-
Close the configuration by typing “no”.
-
Type the URL of the Code42 CrashPlan server. For example: "https://master-server.example.com:4285".
The installation script will download the client installer package from the Master Server and create the custom installer package.
When finished, the following file is added to the Code42CrashPlan_Custom directory:
Code42CrashPlan_Mac.dmg
The Code42CrashPlan_Mac.dmg file contains the Code42 CrashPlan App Installer Install Code42 CrashPlan.pkg and a hidden .Custom directory that contains the custom installation settings you just configured. These are the files you will use to deploy the Code42 CrashPlan app.
For more information on how to create a custom installer package, see the Preparing The Code42 CrashPlan App For Deployment Code42 support article.
Building a Package of the Code42 CrashPlan Custom Installation Settings
Use Composer to build a package of the Code42 CrashPlan custom installation settings so that you can deploy them using the Casper Suite.
The following steps need to be done on a system that does not have the CrashPlan app already installed.
Build a package of the Code42 CrashPlan Custom Installation Settings:
-
Mount the Code42CrashPlan_Mac.dmg file in the Code42CrashPlan_Custom directory by double-clicking it.
-
Create a new CrashPlan directory inside the root-level /Library/Application Support/ folder: sudo mkdir /Library/Application Support/CrashPlan
-
Copy the hidden .Custom directory to /Library/Application Support/CrashPlan/ by executing the following command:
sudo cp -r /Volumes/Code42CrashPlan/.Custom /Library/Application\ Support/CrashPlan
-
Open Composer and authenticate locally.
-
Locate the CrashPlan directory in /Library/Application Support/ and drag it to the sidebar in Composer. The directory will appear under the Sources heading.
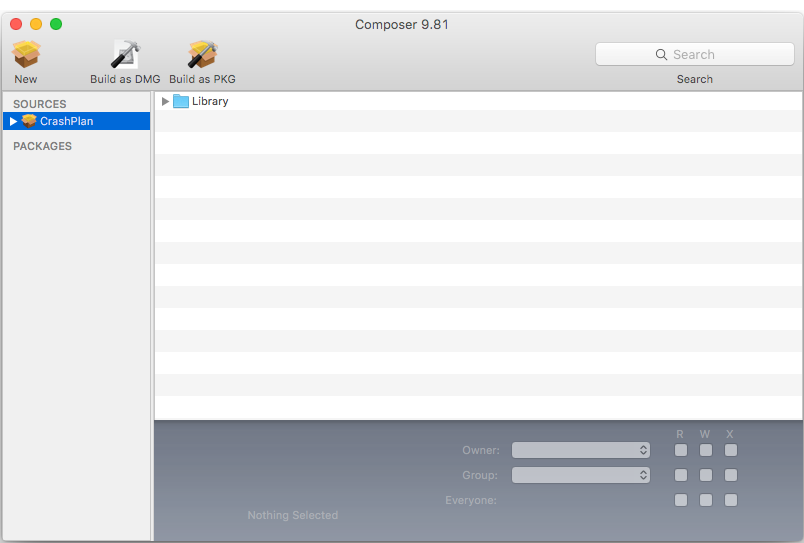
-
Rename the CrashPlan package source to "CrashPlanCustomInstallation".
-
Select the CrashPlanCustomInstallation package source in the sidebar and click Build as DMG.
-
Choose a location to save the package and click Save.
Adding the Installer and the Custom Settings Package to Casper Admin
Add the installer and the custom settings package to Casper Admin so you can deploy them using a policy.
Upload the Code42 CrashPlan App Installer and the Custom Settings Package
-
Open Casper Admin and authenticate to the JSS.
-
Drag the installer CrashPlanPROe.pkg and the custom settings package CrashPlanCustomInstallation.dmg to the main repository in Casper Admin.
The packages are displayed in blue text until you add them to a category.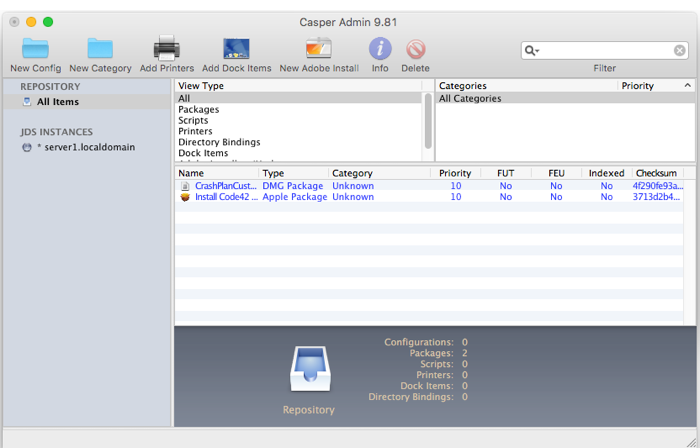
-
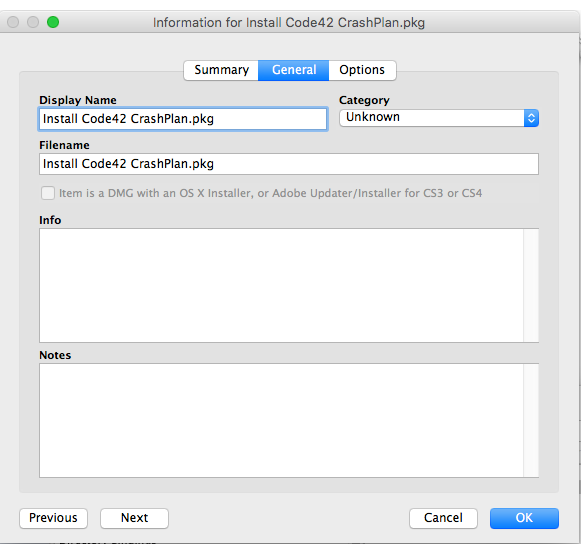
Double-click the installer in the main repository.
-
Click the General tab and choose a category for the package.
-
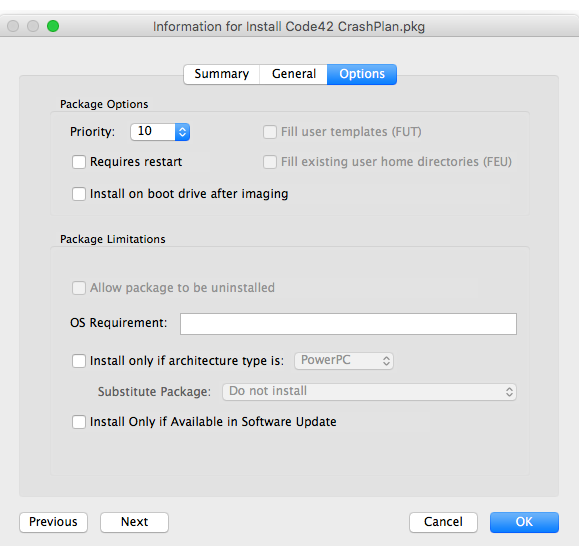
Click the Options tab and choose a priority for the package. The recommended priority for the installer is “10”.
-
Click OK.
-
Double-click the custom settings package in the main repository.
-
Click the General tab and choose a category for the package.
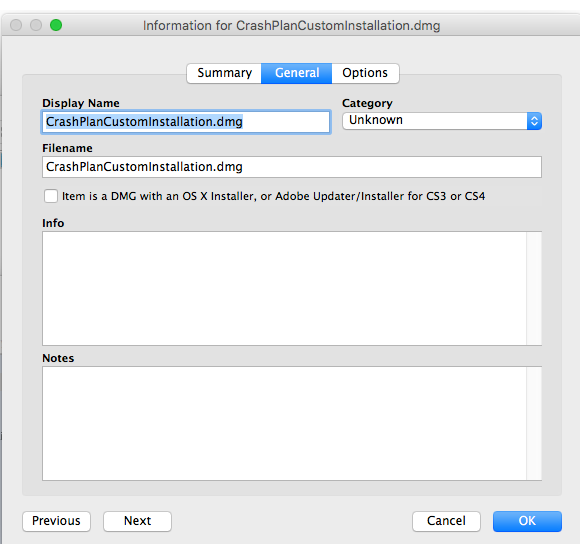
-
Click the Options tab and choose a priority to determine the order for installing the package. The recommended priority for the custom settings package is “8”.

-
Click OK.
Deploying the Code42 CrashPlan Installer and the Custom Settings Package
Deploy the installer and the custom settings package using a policy.
Deploy the Code42 CrashPlan Installer and the Custom Settings Package
-
Log in to the JSS with a web browser.
-
Click Computers at the top of the page.
-
Click Policies
On a smartphone or iPod touch, this option is in the pop-up menu. -
Click New
 .
. -
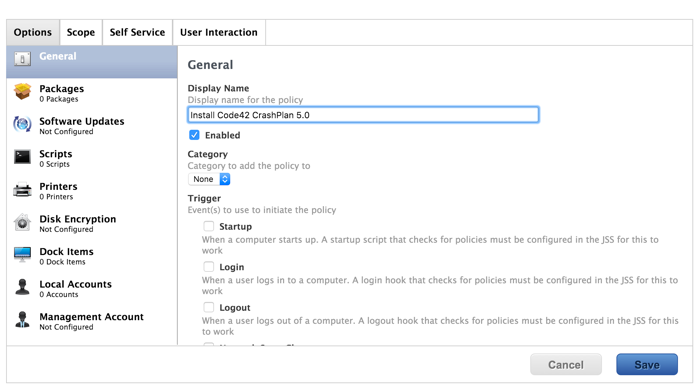
In the General payload, enter a display name for the policy. For example, “Install Code42 CrashPlan 5.0”.
-
Select “Login” as a trigger.
-
Choose “Once Per Computer” from the Execution Frequency pop-up menu.
-
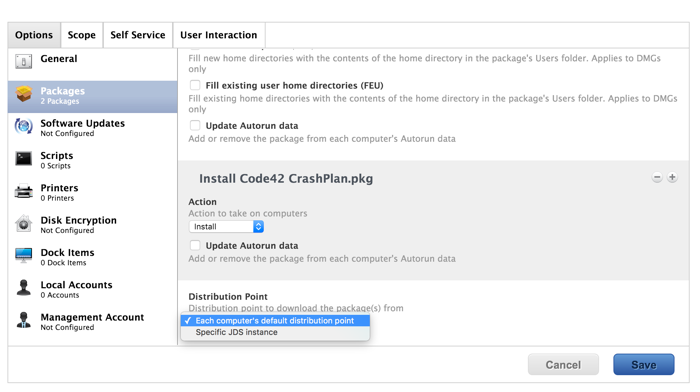
Select the Packages payload, and then click Configure.
-
Click Add for the installer.
-
Choose “Install” from the Action pop-up menu.
-
Click Add
. -
Click Add for the custom settings package.
-
Choose “Install” from the Action pop-up menu.
-
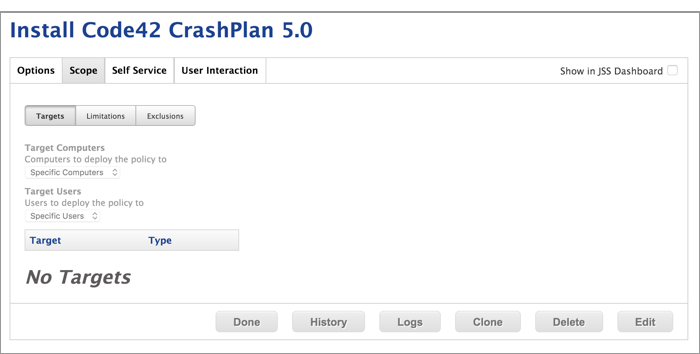
Click the Scope tab and edit the scope of the policy.
-
Specify a distribution point for computers to download the package from.
-
Click Save.
Code42 CrashPlan is installed the next time the computers in scope check in with the JSS and meet all of the criteria. Once Code42 CrashPlan is installed, it automatically begins backing up users’ home directories.