Customizing the User Experience and Enabling Personal Device Enrollment
Enrollment is the process of adding mobile devices to the JSS to establish a connection between the devices and the JSS. User-initiated enrollment allows users to initiate this process by logging in to an enrollment portal and following the onscreen instructions to enroll a device.
Personally owned devices can only be enrolled via user-initiated enrollment.
When configuring personal device enrollment using the User-Initiated Enrollment settings in the JSS, you can do the following:
-
Customize messaging displayed for each step in the enrollment process, including adding different languages.
Note: You can use Markdown, a text-to-HTML conversion tool, to specify formatting for the text displayed to users during enrollment. For more information about Markdown, see http://daringfireball.net/projects/markdown/. -
Enable user-initiated enrollment of personal devices for the iOS and Android platforms.
-
Configure enrollment access for specific LDAP groups.
Note: Enrolling a personal device using user-initiated enrollment requires an enabled personal device profile for the site that the user belongs to, or an enabled personal device profile for the full JSS. Instructions for creating a personal device profile are included in the “Defining Site-Specific Settings and Apps for Personal Devices” section in this guide.
Configuring the User-Initiated Enrollment Settings
-
Log in to the JSS with a web browser.
-
In the top-right corner of the page, click Settings
 .
. -
Click Global Management.
On a smartphone or iPod touch, this option is in the pop-up menu. -
Click User-Initiated Enrollment
 .
. -
Click Edit.
-
Use the General pane to restrict re-enrollment and to skip certificate installation.
-
On the Messaging pane, do the following to customize the text displayed during the enrollment experience and add languages:
-
Do one of the following:
-
To add a language, click Add
 and then choose the language from the Language pop-up menu.
Note: English is the default language if the mobile device does not have a preferred language set on it. -
To customize the text for a language already listed, click Edit next to the language.
-
-
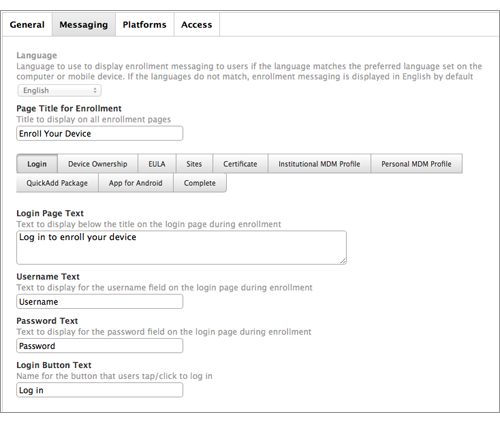
In the Page Title for Enrollment field, enter a page title to display at the top of all enrollment pages.
-
On the Login tab, use the fields provided to customize how you want the Login page to be displayed to users.
-
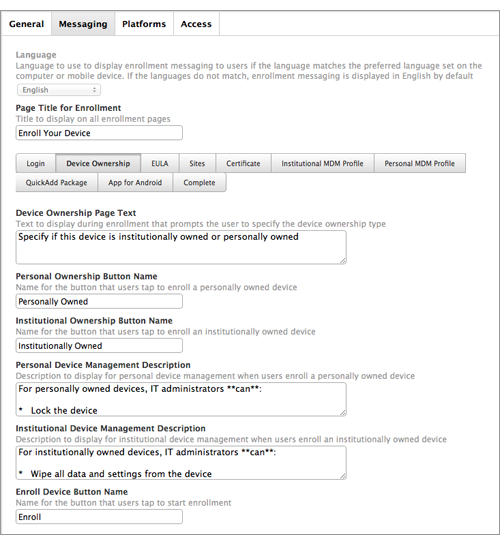
Click the Device Ownership tab and use the fields provided to customize the text that is displayed to users based on their device ownership type. The text displayed and the enrollment page that the text displays on depends on the enrollment options that you enable:
-
If you enable user-initiated enrollment for both institutionally owned and personally owned iOS devices—Customize the text that prompts users to choose the appropriate device ownership type, and customize the device management description that explains the IT management capabilities for each device ownership type. When users select the personal or institutional device ownership type, the respective device management description is displayed.
-
If you enable user-initiated enrollment for personally owned devices only—Customize the device management description that explains the IT management capabilities for personal device ownership. This description is accessible to users by tapping the Information
 icon displayed on the Personal MDM Profile page during enrollment.
(For instructions on enabling user-initiated enrollment for the iOS and Android platforms, see step 8 later in this procedure.)
-
-
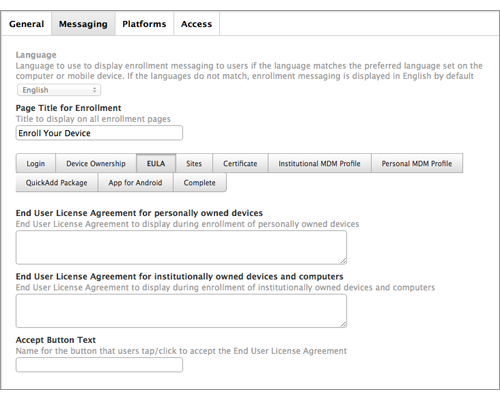
Click the EULA tab and use the fields provided to specify an End User License Agreement (EULA) for personally owned devices. If the EULA fields are left blank, a EULA page is not displayed to users during enrollment.
Note: The EULA page is not displayed for users logging in with a JSS user account.
-
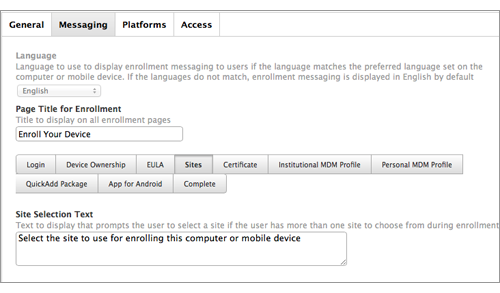
Click the Sites tab and customize the message that prompts users to choose a site.
-
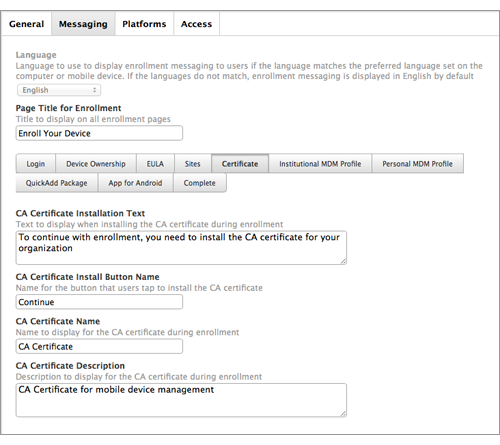
(iOS only) Click the Certificate tab and use the fields provided to customize the message that prompts users to install the CA certificate for mobile devices to trust at enrollment.
-
Click the Personal MDM Profile tab and use the fields provided to customize the message that prompts users to install the MDM profile for personally owned devices.
You can also specify the MDM profile name and description to display during enrollment.
Note: The MDM profile installation text and MDM profile name are not displayed during enrollment of an Android device.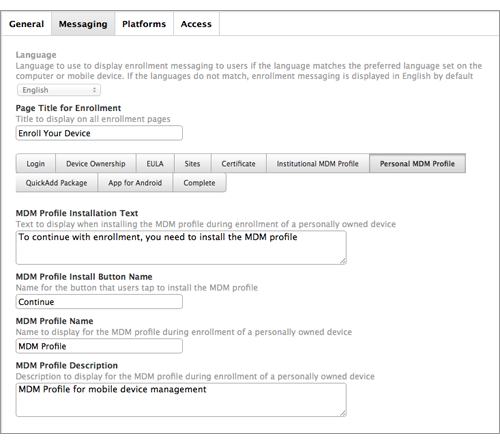
-
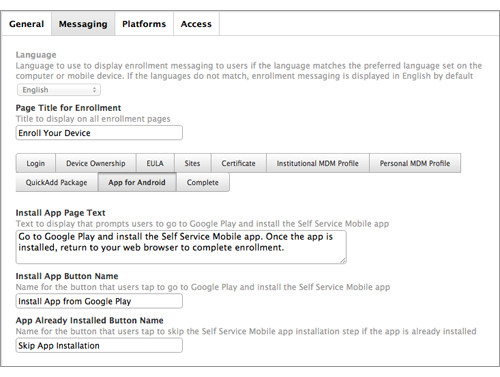
(Android only) Click the App for Android tab and use the fields provided to customize the message that prompts users to install Self Service Mobile for Android from Google Play.
-
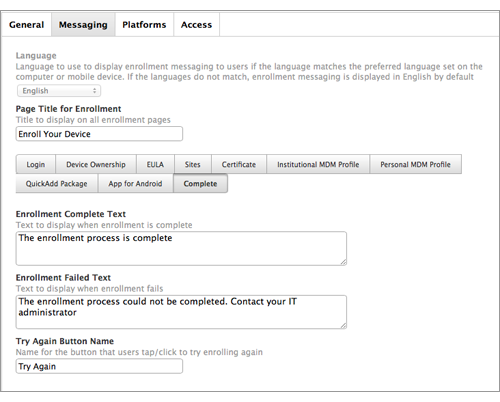
(iOS only) Click the Complete tab and use the fields provided to customize the messages that are displayed to users if enrollment is successful or if it fails.
-
Click Done.
-
-
On the Platforms pane, do the following to enable user-initiated enrollment for each mobile device platform as needed:
-
To enable enrollment for personally owned iOS devices, click the iOS tab and then select the Enable user-initiated enrollment for personally owned iOS devices checkbox.
-
To enable enrollment for personally owned Android devices, click the Android tab and then select the Enable user-initiated enrollment for personally owned Android devices checkbox.
-
-
On the Access pane, do the following to configure enrollment access for all LDAP users and/or specific LDAP groups:
-
Do one of the following:
-
To configure enrollment access for a specific LDAP user group, click Add
and then search for the group. -
To configure enrollment access for a group already listed, click Edit next to the group.
-
-
To allow the group to enroll personally owned devices, select the Allow group to enroll personally owned devices checkbox.
-
(Optional) If there are one or more sites in the JSS, choose the site you want to allow the LDAP user group to select during enrollment.
If an LDAP user belongs to more than one LDAP user group in the JSS, the user will have the option to choose a site from a pop-up menu of sites assigned to each of those groups. -
Click Done.
-
-
Click Save.